Kick off the New Season with our Amazing Offers!
Save £5 now!Subscribe to our Newsletter!

  Camping Specialist Since 1958
Just arrived to the UK! --> New products coming in every week!
Service
EN
Tents Tents
All products in "Tents"
Outdoor & Leisure Outdoor & Leisure
All products in "Outdoor & Leisure"
Furniture Furniture
All products in "Furniture"
Household Household
All products in "Household"
Gas Gas
All products in "Gas"
Water & Sanitation Water & Sanitation
All products in "Water & Sanitation"
Electronics Electronics
All products in "Electronics"
Caravanning Caravanning
All products in "Caravanning"
Multimedia Multimedia
All products in "Multimedia"
Heating & Cooling Heating & Cooling
All products in "Heating & Cooling"
Spare Parts Spare Parts
All products in "Spare Parts"
Brands Brands
All products in "Brands"
Trending Topics Trending Topics
All products in "Trending Topics"
Nachrüsten
Elektronik
Two black square recessed frames side by side, each with two vertically stacked USB-A sockets, four corner screws, on a gray concrete surface
© Fritz Berger
Icon Bus
Icon Wohnwagen
Icon Wohnmobil

Retrofitting a USB socket in the motorhome

Charging USB devices via the on-board power supply of the camping vehicle

These days, nothing works without USB connections. However, there are often not enough connections for cameras, mobile phones and tablets in motorhomes and caravans. That's why you can read here how to easily retrofit a USB socket.


Table of contents


Functions of the new USB sockets

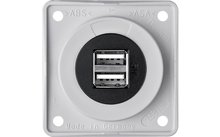
We decided to install two USB sockets in the cupboard next to the door. There are four connections to charge all electrical devices at the same time.

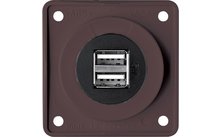
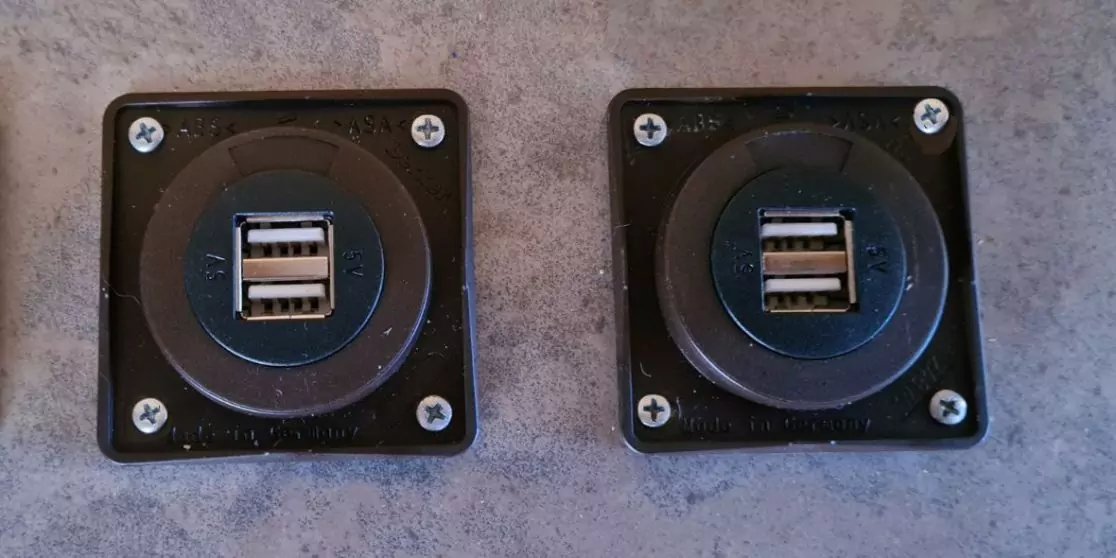
  • Overall dimension 59.5 by 59.5 mm
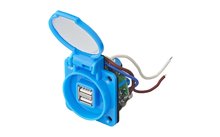
  • single frame
  • two USB sockets type A
  • Input voltage: 12 V
  • Output voltage: DC 5 V (+/- 5 %, 2x2.5 A)


Installation report: USB socket

Gray tabletop against wood paneling; two black outlets on a wooden post at left; a small black rectangular device on the tabletop; patterned cloth at the right edge

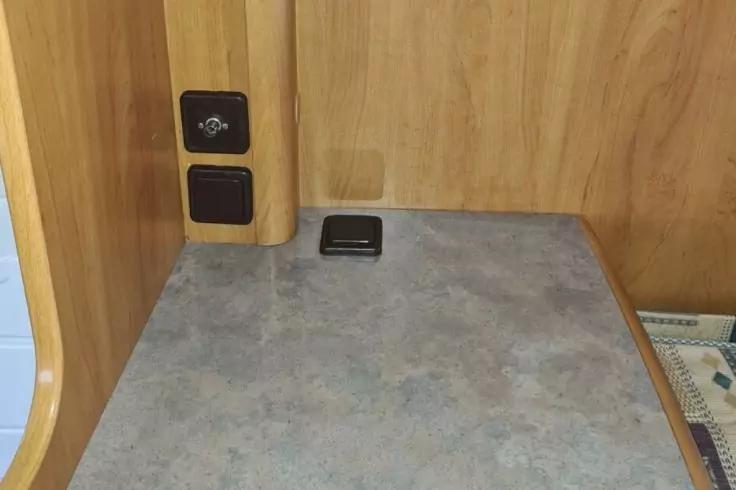
The small cupboard between the entry door and the bed is perfect for the new USB sockets. There are several reasons for this:

  • A central location that can be accessed from anywhere in the motorhome.
  • The cabinet also serves as a shelf for devices to be charged.
  • There is already electricity here.
  • You can easily work on the wiring from below.
Empty wooden compartment with metal drawer slides on both sides and several loose cables at the back

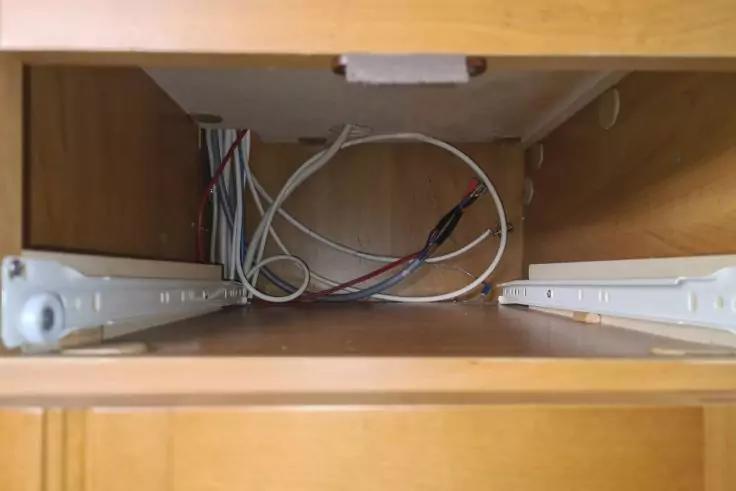
The pulled-out drawer makes it easy to reach the power cables and work on them.

Counter surface in front of wood paneling with metal ruler, red pencil, black rectangular device, yellow masking tape along the back edge, and patterned fabric on the right

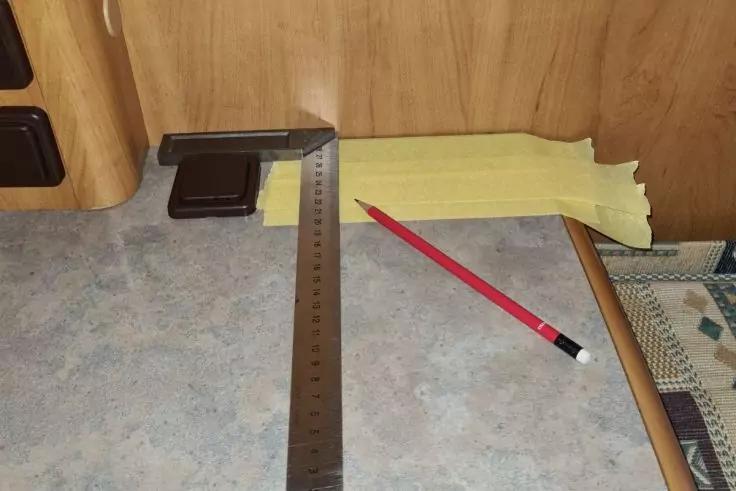
The new USB sockets measure 59.5 by 59.5 millimetres. To ensure that the distance of the sockets to each other and to the wall is the same, everything must be precisely measured beforehand.

A power drill with a hole saw attached, a drill bit, and a screwdriver with a yellow handle on a work surface in front of wooden paneling

Make sure you use sharp tools and work carefully. This is the only way to achieve good results.

Black drill head with round hole-saw attachment on yellow paper on a gray work surface; wood shavings under the metal attachment, wood-paneled wall in the background, brown plastic container lid to the left

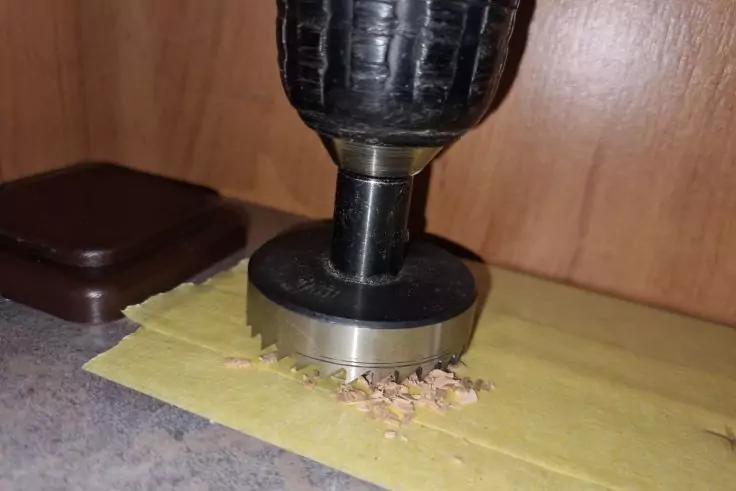
To prevent the top of the cupboard from splintering when we drill into it, we masked the surface with masking tape.

Electric drill with circular cutting blade next to two round holes in a wooden panel, wood shavings and yellow tape visible, vertical wood paneling in the background

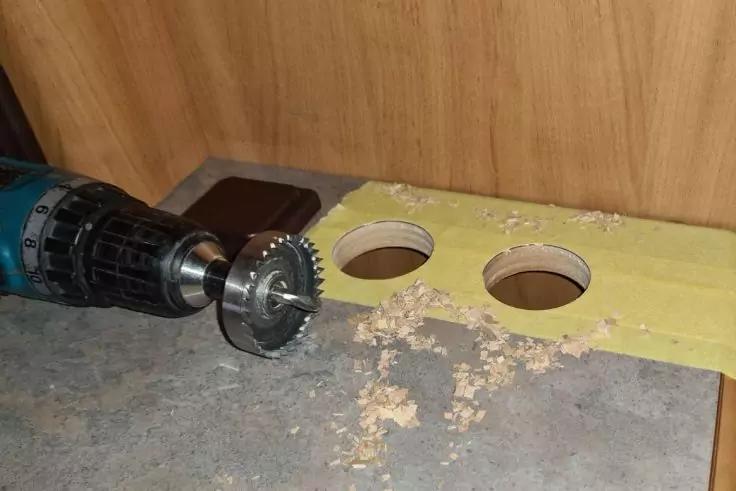
We then remove the masking tape and the sawdust and clean the surface again.

Then insert the sockets and screw them in place.

Hand holding a black wire stripper with a blue "stripax" logo; red and black wires in the tool on a light floor

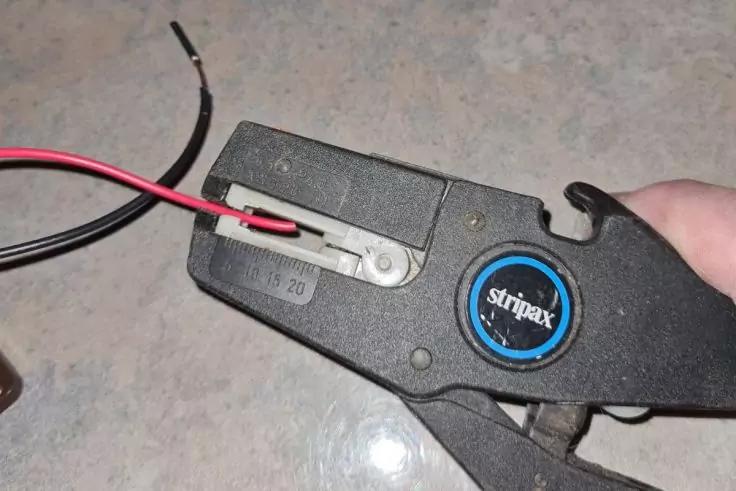
To connect the cables, the wires are stripped with the help of a wire stripper. Be careful not to cut the insulation deeper than necessary to remove the insulation layer, so as not to damage the electrical conductors.

Brown square plastic bracket with a round component and several insulated wires in red, blue and black; the end of one blue wire is stripped

To prevent short circuits or shearing off of the conductor, wire end ferrules are used.

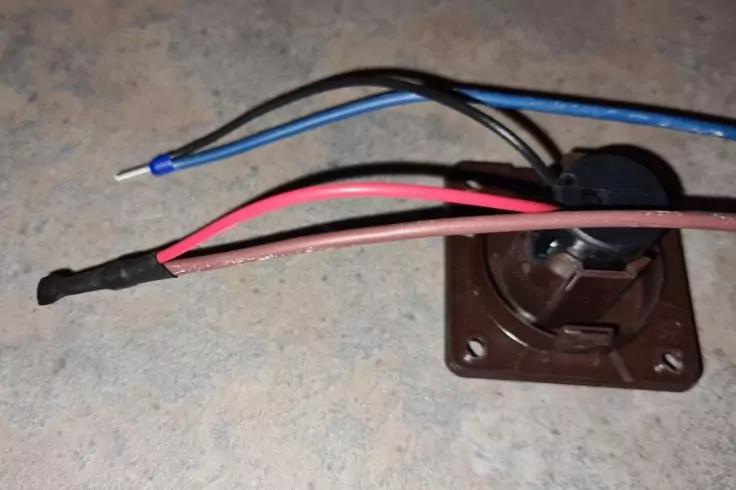
Then the cables are connected according to the colour scheme in the motorhome (follow the instructions for use).

Three brown square plastic cases on a countertop; two open, each showing a round compartment with a small black device with a rectangular display; left case closed; a hand pointing at the right open case

Finally, the two sockets get cover frames with hinged covers.


Author

Svenja

Svenja ist seit Jahren mit Mann, Kind und Hund im Zelt und Wohnwagen durch Europa unterwegs. Sie liebt die Entschleunigung, die man beim Campen erfährt.
Your session will run in
10 : 00
Min. Sec.